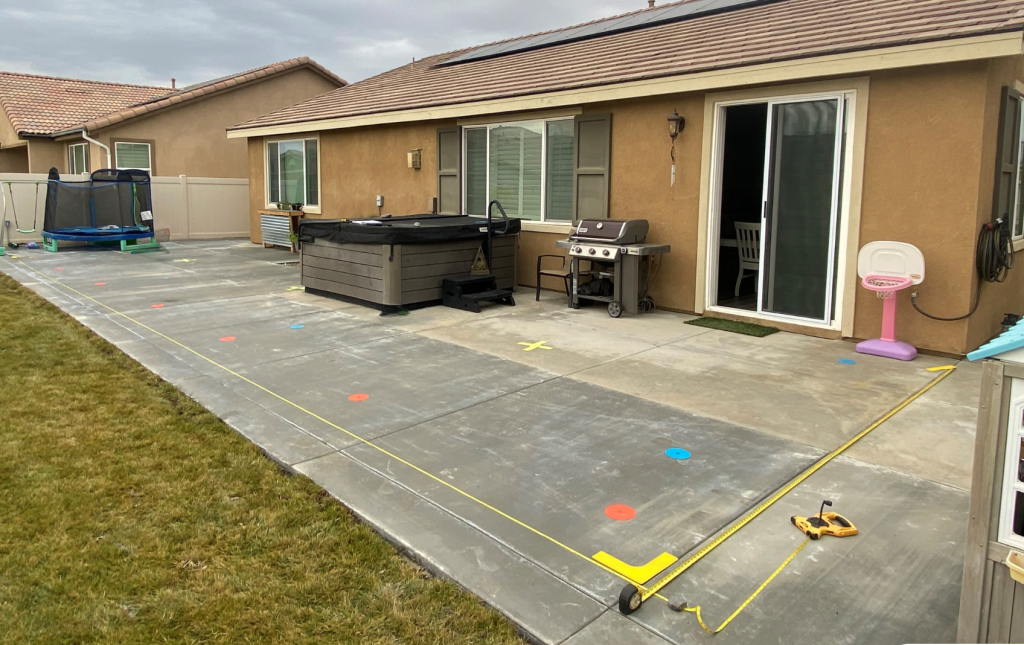
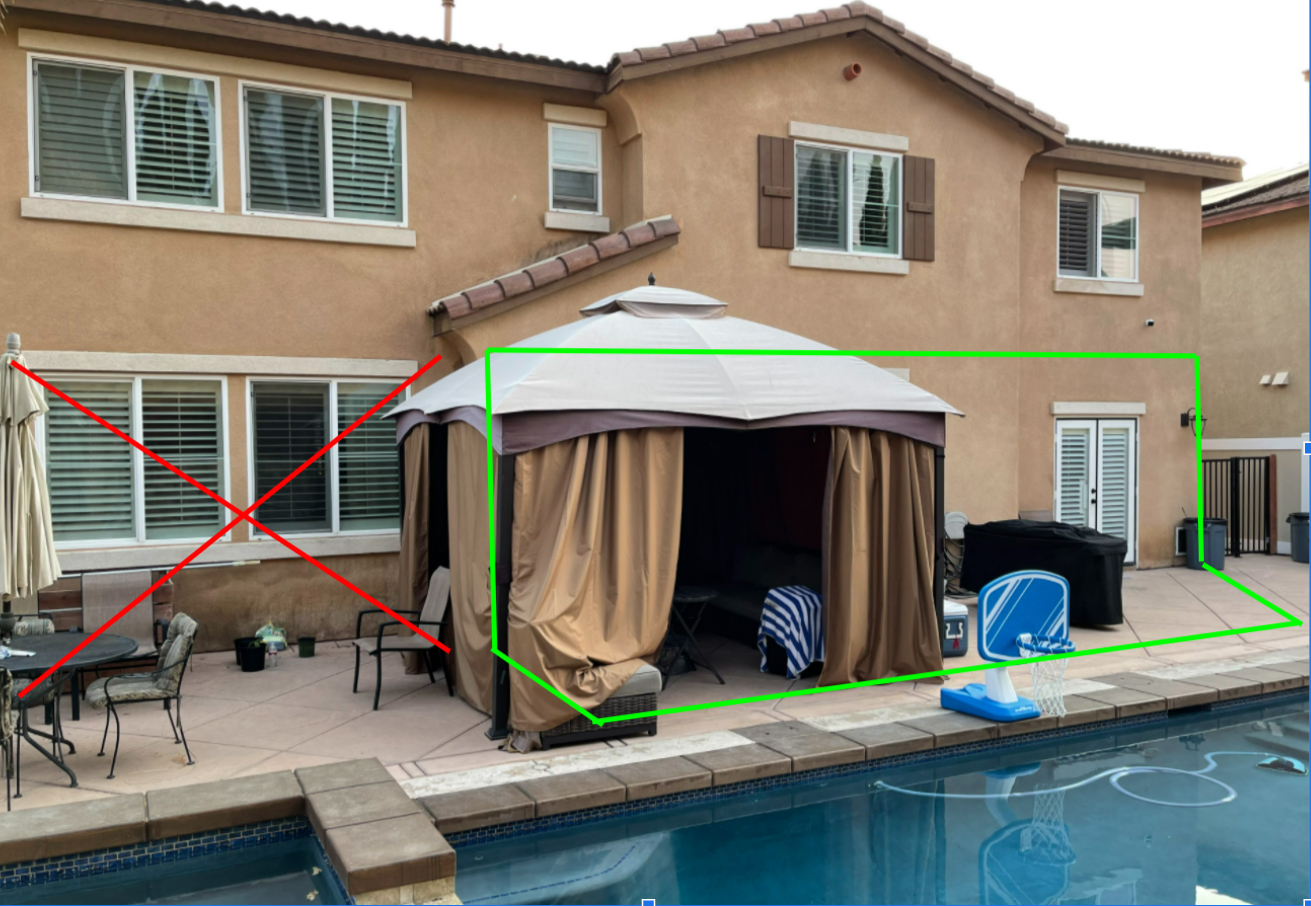
estimate Process
At Podium we take pride in our attention to detail and efficiency
We strive to give customers the best experience possible by going above and beyond from start to finish.
- Step 1
Information Gathering/Rough Quote
We will ask your name, address, phone number and what size cover you need. We will also request a picture of the back of the house where your new patio cover will be located to check for any build issues such as window elevation issues decorative pop outs or low facia boards that may inhibit the build

Backyard Photo
This customer added simple lines to his photo indicating the desired location of the new cover. Although this is not required it was very helpful to understand his vision.
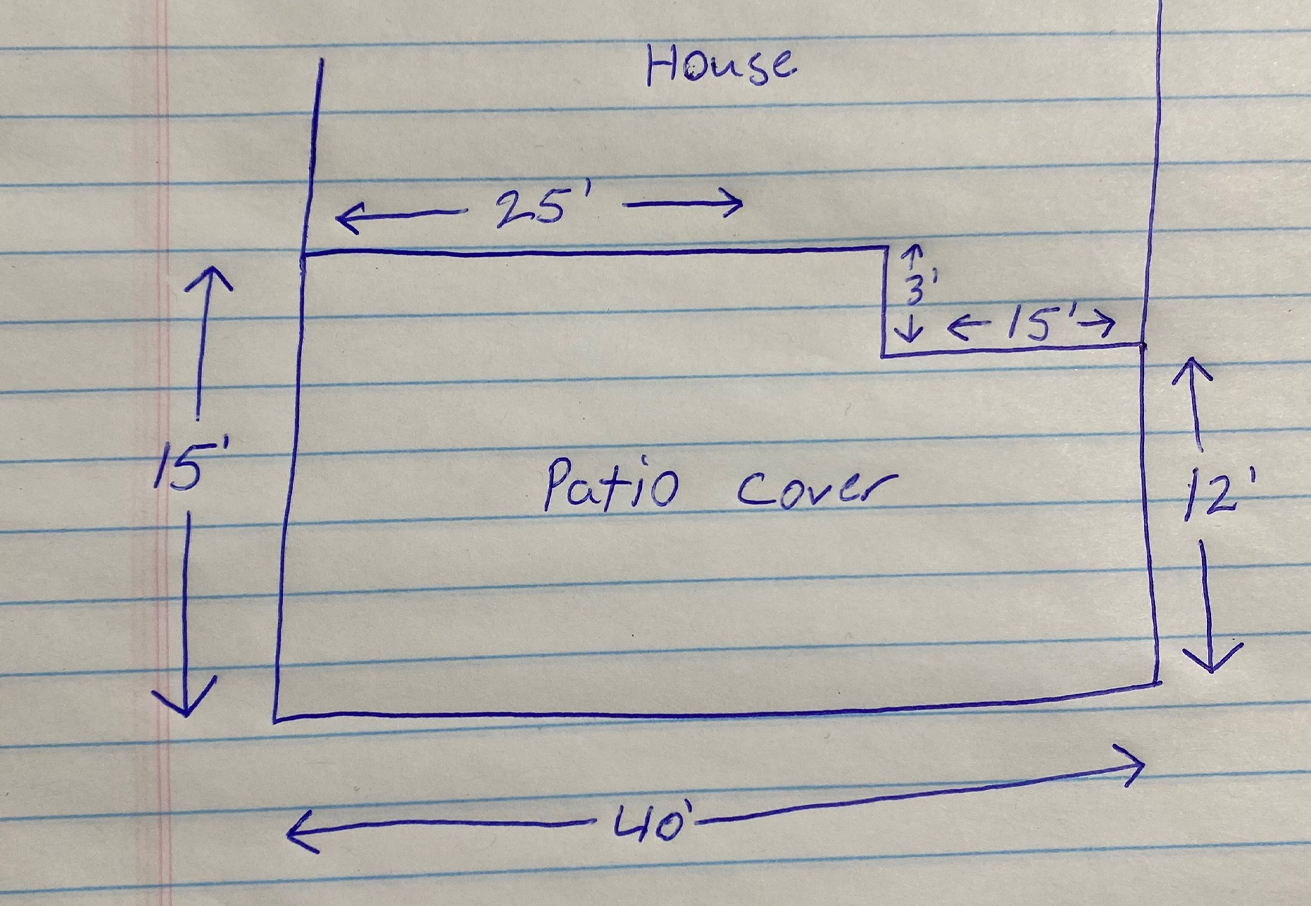
Simple drawing
A quick sketch or drawing is a great way to help us see what you need.

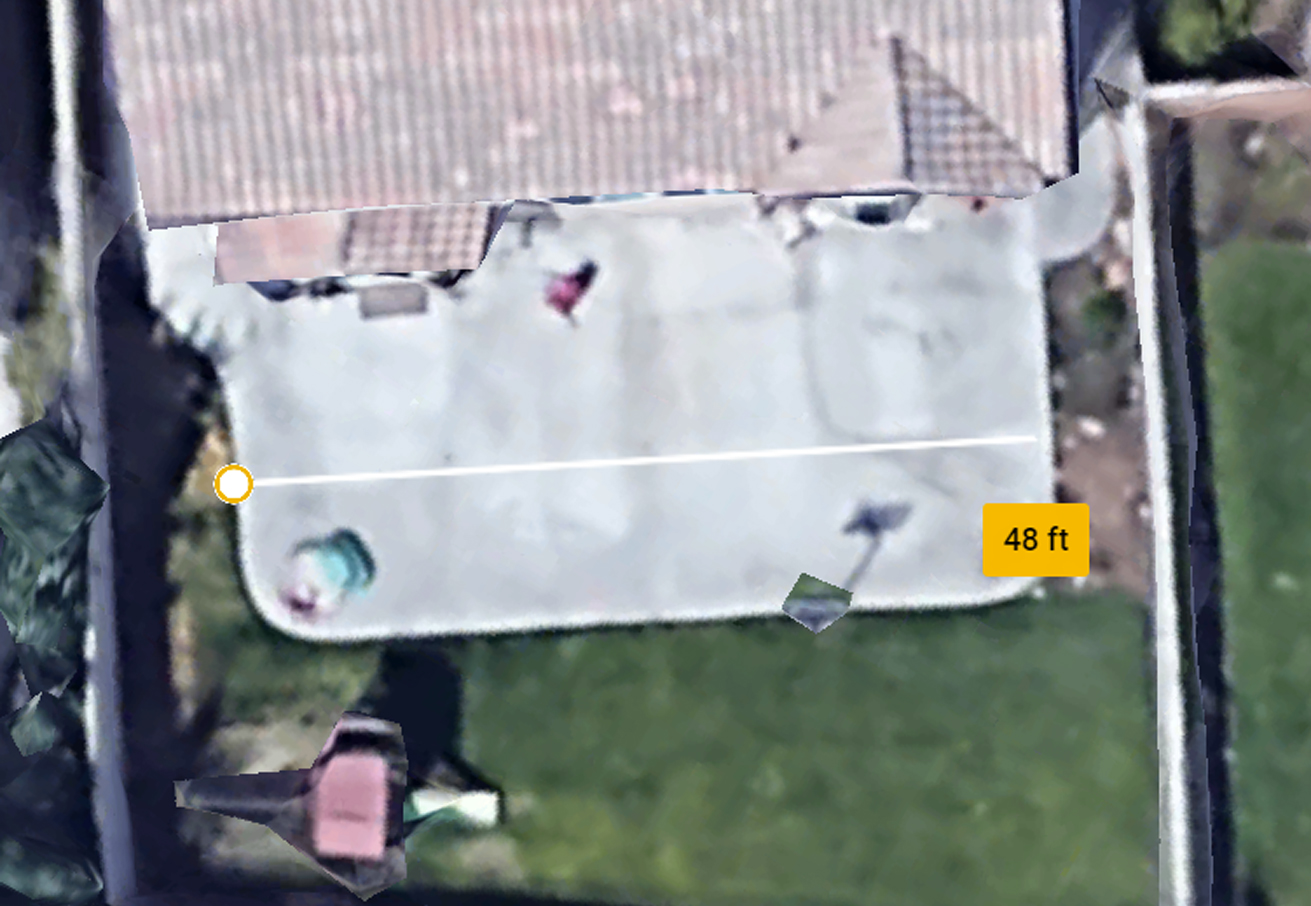
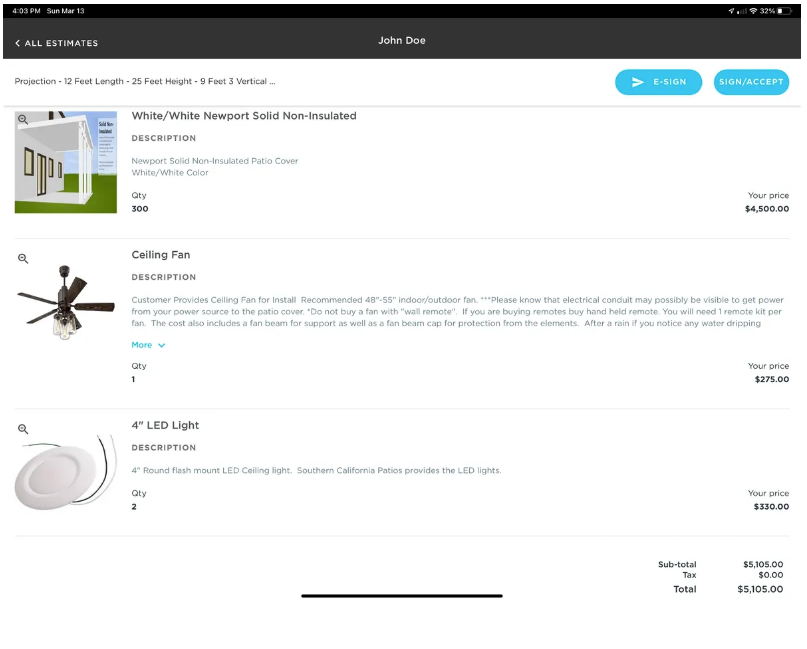
Don’t Know The Measurements? No Problem
Once we have your address we can use our tools to get ballpark measurements and provide you with a rough quote to get started.
Now that we have an understanding of your needs you will be provided with a rough quote based on the measurements submitted. At this point if our design, price and timeline meet your expectations we can schedule an In-Home design confirmation meeting.
- Step 2
In-Home Design Confirmation Meeting
At this meeting Garrett or Breanne will confirm measurements, colors and lay out your entire project using visual aids to represent your new patio.
This allows our customers to see the location of the patio roof, vertical post and requested electrical options such as fans lights or plugs before making a final decision.
After we discuss all options we will document the lay out with photos and videos and attach them to your contract.
This detailed prosses prevents unforeseen problems on the day of install such as a post in front of a walk way or BBQ island.
It also allows us to revisit all the details we discussed when we return to build your new patio cover.


Extra Effort
We want to make sure our customers have everything they need to make a decision with confidence.
All photos and videos from our design meeting will be attached to your bid and sent to you at the end of the meeting for future review.
- Step 3
E-Sign The Contract
To approve the estimate, you simply sign digitally on your phone, tablet or computer.
At this time you’ll be asked to pay a 10% deposit to reserve your install date.

Build Process
What To Expect On Build Day
The day before install
The crew will hit the ground running between 7:30 and 8:00 am on the day of install so it is important to be ready. We ask that you clear the work area and entry way of patio furniture, potted plants, kids toys or other obstructions that may impede the build process. These items are best moved to the side yard opposite the point of entry or against the back fence. To be efficient we need as much room as possible in the project area and also the surrounding areas to stage your material and set up tools.
(Podium crew is happy to help with heavy or bulky items such as a patio table)
If we are installing fans on your project please confirm they are outdoor rated and have them available the day of the build. We will also need access to the attic or an upstairs bedroom to pull the power for fans/plugs. If we are only installing ceiling lights no access inside the home is required .
We also ask that you please clean up after your four legged family members.
install day
After we unload tools and material we will begin the layout process. Using a laser level and chalk lines we will determine final elevation, electrical fixture and post locations. When we have exact locations marked out we will ask you to approve the final layout then begin building .


Attaching To Your Home
We attach the hanger using 1/4” lag bolts in every stud or 16” on center to the top plate of two story homes. Every bolt hole is sealed with caulking before the bolts are tightened. The hanger is then sealed using flashing and three layers of caulking. We also use a foam hanger gasket to help prevent any drips that may be caused by water blowing or splashing under the flashing.
Attaching To Your Concrete
In most cases we can attach directly to your existing slab of concrete with no additional footings required using 3/8” stainless steel anchors.
Electrical
We use the good stuff! At podium we never cut corners and hold the highest standards when it comes to your safety. All fans and plugs are GFI protected using only weather and tamper resistant receptacles. we also stock all available color options for our boxes and water proof covers. We only use the gray type UF-B outdoor rated wire and make sure every hole gets a protective grommet. We also do are best to make sure no unnecessary conduit is visible by running our wire to an upstairs bedroom or through the attic as opposed to one of the lower exterior plugs with the conduit exposed.
Clean up
A good clean up is just as important as a good build. We take pride in every aspect of our job all the way down to the clean up. At the end of the day we will wipe down and touch up the patio to remove any finger prints pencil marks or scratches left during the manufacturing and install process. we will also pick up all the trash, sweep, vacuum and blow off the patio area.
Electronic quote form
Our electronic quote form makes it fast and easy to get started. Simply fill out a few details about your project, and our team will review your request and get back to you with a personalized estimate. It’s a convenient way to skip the back-and-forth and get the information you need, right from your phone, tablet, or computer.